
Made With Unity | Unity VR Part 3: Move In VR

I am a developer from Puerto Rico.
I develop games or applications with Unity C#. Constructing flexible and maintainable systems through event-driven designs that follow solid principles with a strong awareness for optimization and performance. With a focus to deliver complete and optimized experiences on mobile as well as PC and consoles. All my projects are saved using GitHub. Great at communicating and working in team environments. Love to learn new things and I am always looking for new opportunities.
There are two basic ways to use VR Locomotion in Unity: Teleportation and Continuous Movement(moving with the joystick).
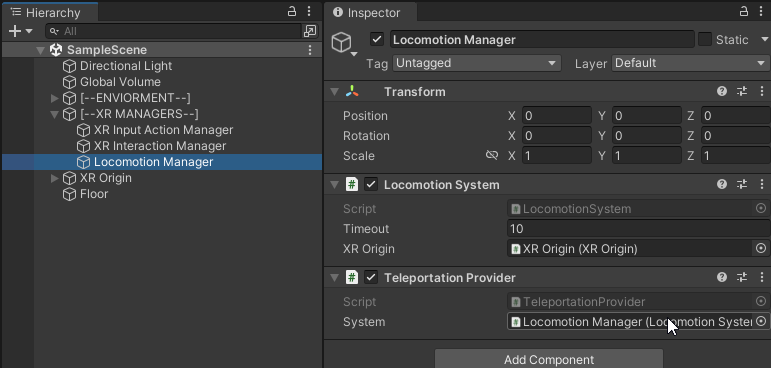
To use these locomotion features in Unity, we need to add in our Hierarchy the Locomotion System script and the Teleportation Provider script component.
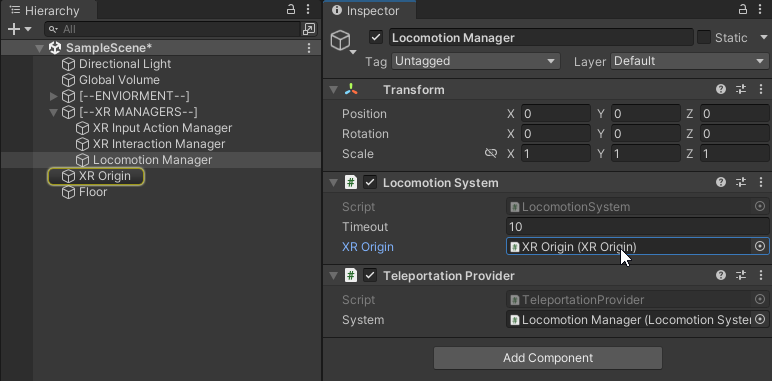
Please create a new 3D object and call it Locomotion Manager; add the components Locomotion System and the Teleportation Provider, and make the necessary reference as the image shows.

TELEPORTATION
OpenXR provided us with two teleportation components: Teleportation Anchor and Teleportation Area.
TELEPORTATION ANCHOR
The Teleportation Anchor script component allows you to place an anchor / specific spot where you want to play to be in a particular section of the level.
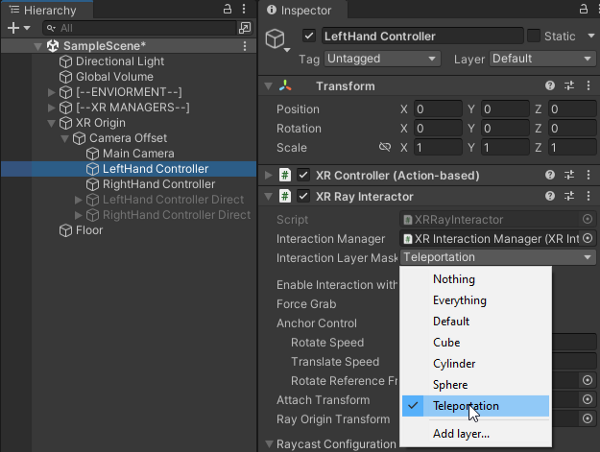
A new Interaction Layer Mask called Teleportation was created and will the added to the teleportation spot. The same layer must be applied to the Hands Controller using the XR Ray Interactor.
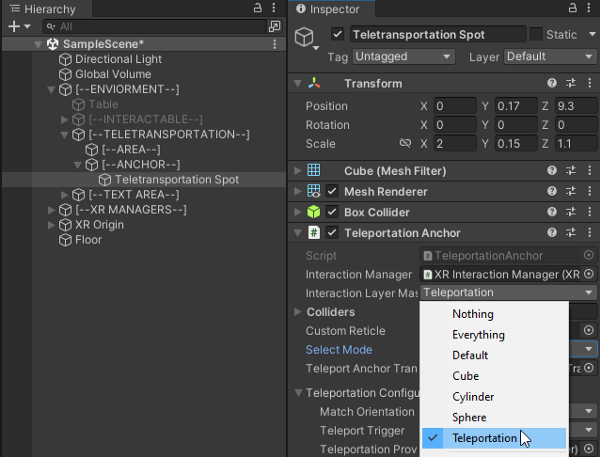
In the following image, each square teleportation spot game object has a Teleportation Anchor script component and a child game object called Anchor. The Anchor game object goes in the Teleport Anchor Transform field on the Teleportation Anchor script component. Depending on where the Anchor is placed is where my player will be anchored to.
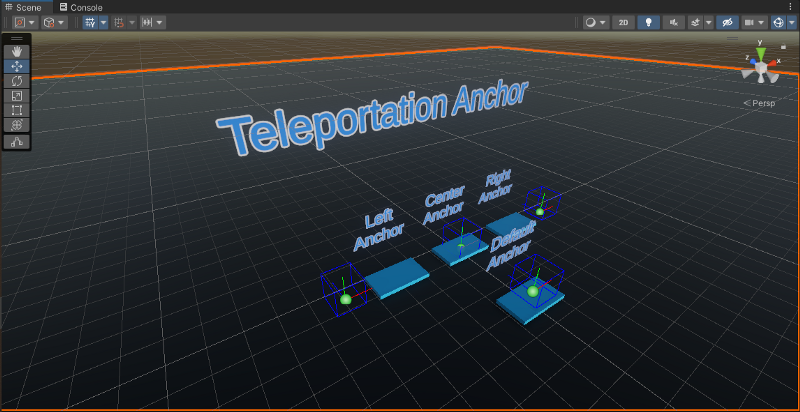

The Default Anchor does not have the Anchor child game object. By default, if there’s no object to be the Anchor, the script will use the default position of the game object that has the Teleportation Anchor script component.

The Left Anchor spot has is Anchor to the left side; regardless of where is the teleportation spot the Anchor will move the player to the left side.
The Center Anchor has the Anchor game object in the center of the teleportation spot
The Right Anchor spot has is Anchor to the right side; regardless of where is the teleportation spot the Anchor will move the player to the right side.

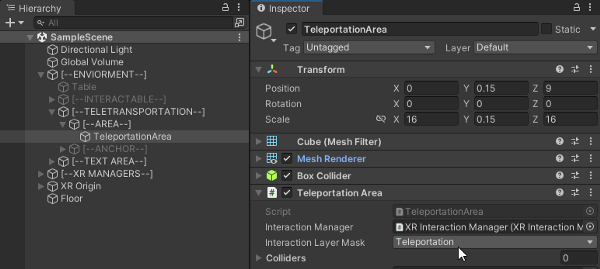
TELEPORTATION AREA
The Teleportation Area script component allows you to move in any level section depending on where you aim your ray. We add the Teleportation Area script component with the Interaction Layer Mask of Teleportation to any object pretending it is our floor.


CONTINUOUS MOVEMENT
TURNS
Turn script components allowed us to turn our player with the help of the Joystick in our controllers; we have Continuous Turn Provider and Snap Turn Provider.
Continuous Turn Provider (Action-based)
On your XR Origin / Player, add the component Continuous Turn Provider (Action-based) to turn/rotate smoothly in the environment without rotation in the real world.

Snap turn Provider (Action-based)
Adding the Snap Turn Provider (Action-based) component will be allowed to turn with a snapping effect.


MOVE
For a complete motion system, we have Continuous Move Provider (Action-based), which will allow us to use the Joystick to move Forward, Back, Left, and Right. On the Forward Source field, we add our XR Origin object to get him forward.


If we want to control the rotation base in how we rotate our body in the real world, we add the Main Camera from our XR Origin in the Forward Source field. Remember that our Main Camera is being controlled with our VR Headset. Where we rotate is where our forward will be.

COMBINING COMPONENTES
My XR Origin has a Continuous Move Provider (Action-based) and a Snap Turn Provider (Action-based); with this combination, I can move with my Left Joystick Hand Controller, rotated in the real world, controlling my rotation in my VR environment. If I am sitting and can’t move, I can Snap Turn using my Right Joystick Hand Controller.


🎮[PART 4]🎮


