
Made With Unity | Using Blender to Convert Ready Player Me Avatars to FBX

I am a developer from Puerto Rico.
I develop games or applications with Unity C#. Constructing flexible and maintainable systems through event-driven designs that follow solid principles with a strong awareness for optimization and performance. With a focus to deliver complete and optimized experiences on mobile as well as PC and consoles. All my projects are saved using GitHub. Great at communicating and working in team environments. Love to learn new things and I am always looking for new opportunities.
In this article, we will walk through converting a Ready Player Me avatar from GLB to FBX using Blender.
What Is Ready Player Me?
Ready Player Me is a virtual reality platform that allows users to create and customize their avatars, digital representations of themselves. These avatars can interact with other users in virtual reality environments, such as games or social spaces. Ready Player Me is designed to be accessible to a broad audience, focusing on user-generated content and creativity.
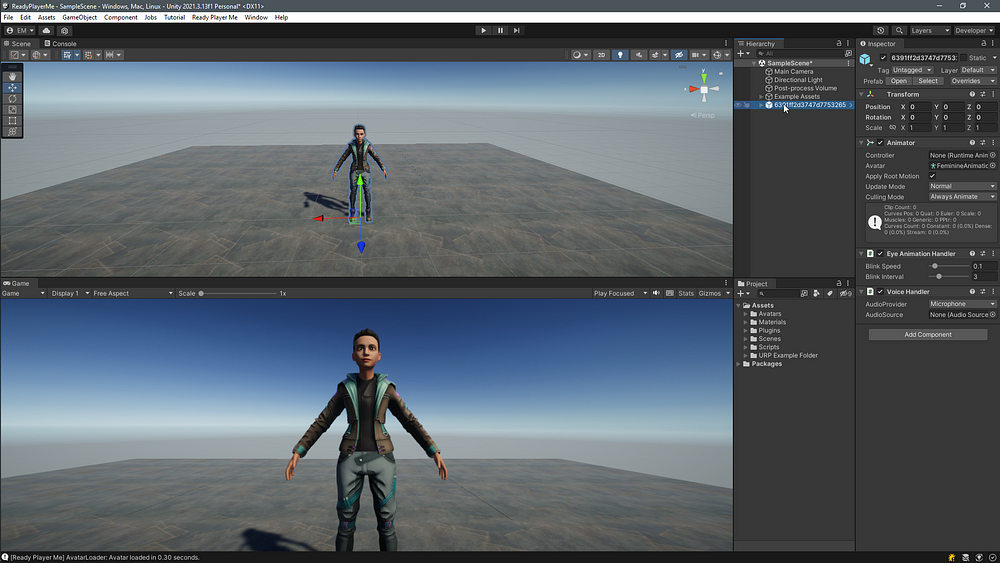
The avatars you create can be used on Unity, thanks to their Unity SDK. They already have their armature, animator, and animation avatar, allowing us to easily add animations from Mixamo or create our own.
Why Convert To FBX?
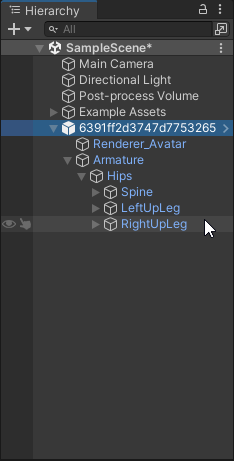
Notice in the picture above the model of the avatar is a GLB format, and it does not give us the option to other sections of the model body like eyes, mouth, hair, etc., if we want to create layers or play around with the texture. Everything is embedded as one.
I want access to this model section to use my avatar in VR, and if I want to put the camera as close as possible to the eye, I want to ignore or remove my avatar’s eyes.
GLB To FBX
Getting The Avatar From Ready Player Me
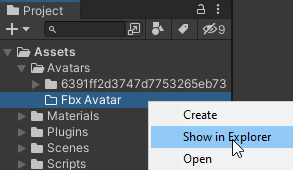
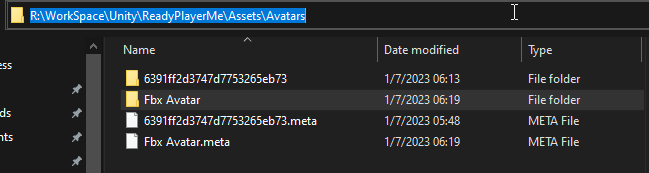
In Unity, please create a new folder called FBX Avatar, right-click on it, select Show in Explorer, and copy the path of that newly created folder.

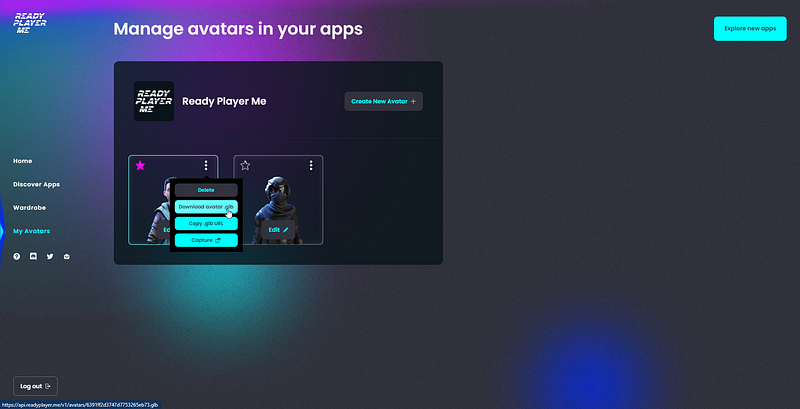
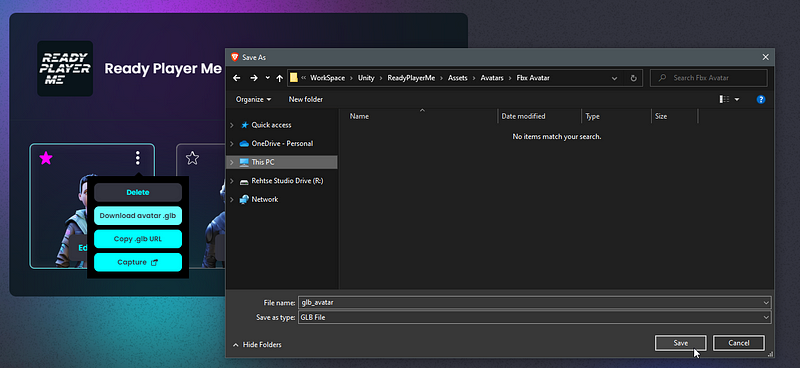
On the Ready Player Me hub, where you see all your created Avatars, select one, press Download avatar .glb, and save it into the newly created folder on Unity.
NOTE: You can not use the one from Unity if you got your avatar from the SDK. The converting process will not work using that model. It must be directly from the hub that we get the Avatar GLB model.
Using Blender
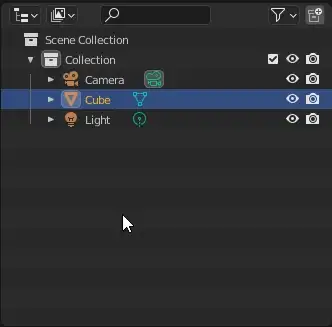
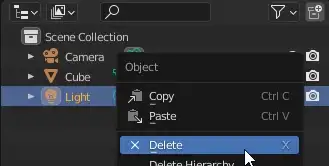
Open or download Blender 3D on your PC. Once open, right-click on everything and press delete using the small windows to your right that say “Scene Collection.”
On Blender, in the top Menu, go to File->Import->press on gLTF 2.0 (.glb/.gltf)

Find the GLB model in the folder in Unity and press Import glTF 2.0


Exporting To FBX
Here comes the tedious part.
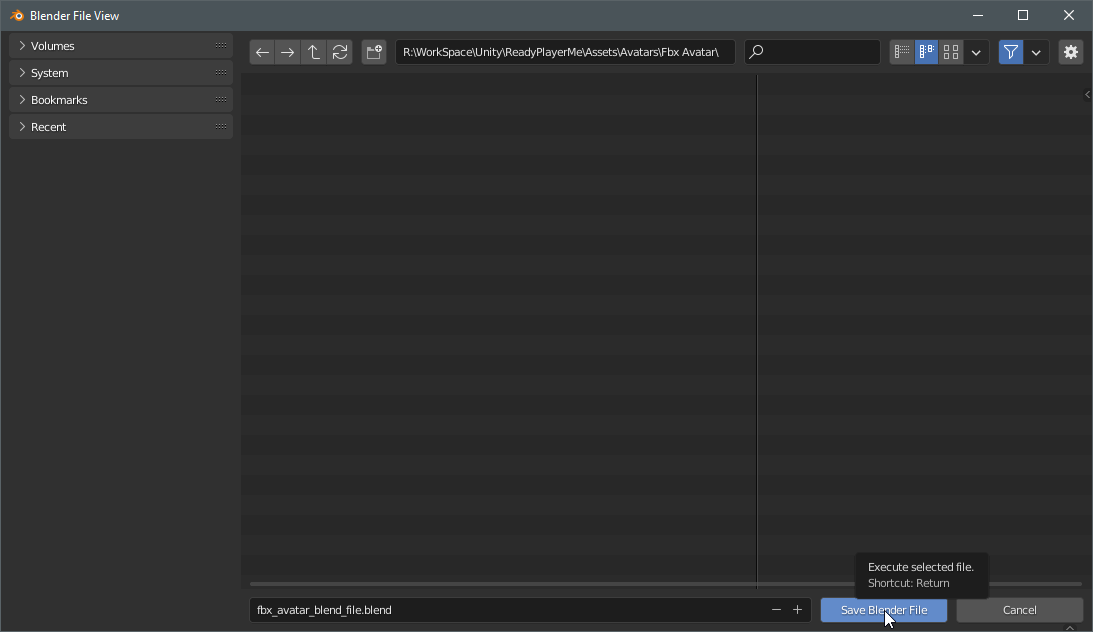
Save the project as a blend file first, and save it in the same folder where you have the GLB model in Unity. That’s why I said to save the path from that folder🤣

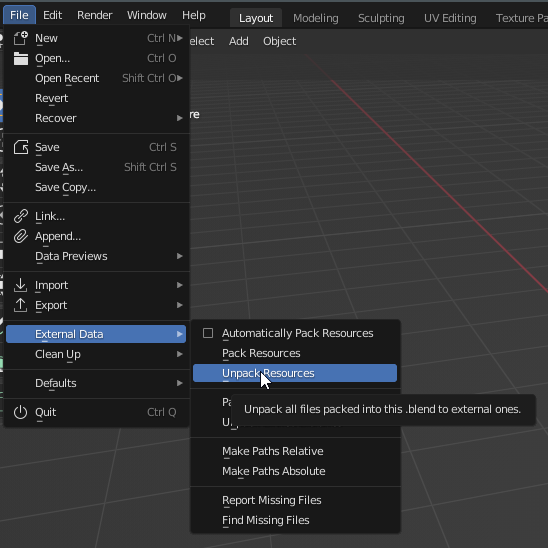
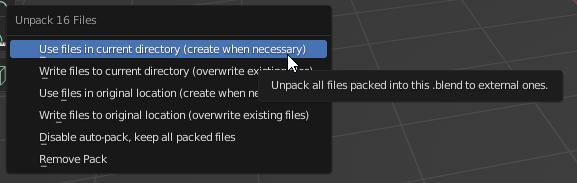
Once the blend file has been saved, go to File->External Data->press Unpack Resources and select Use files in current directory (create when necessary).
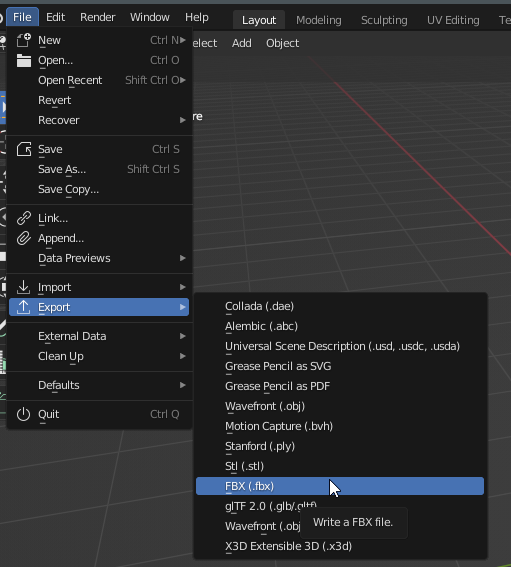
Go back to *File->Export->*and select FBX
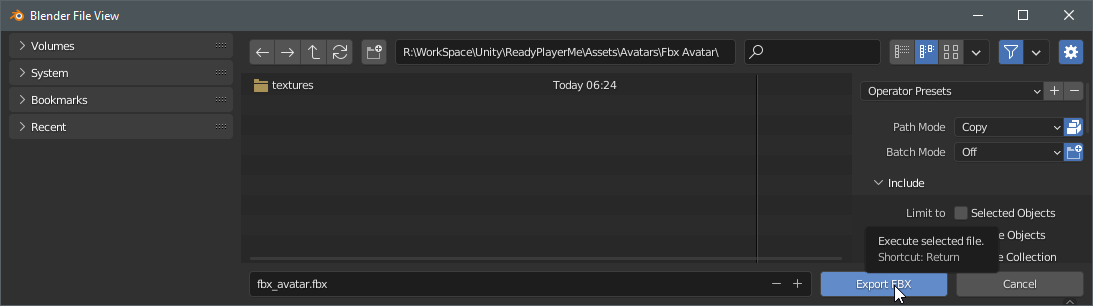
Before you export, please ensure Path Mode is set to Copy and the button next to it is selected; it has to be blue.
Press Export FBX
On Unity
You can go back to Unity; the system will start to recompile, and when the NormalMap settings windows pop-ups select Fix now.

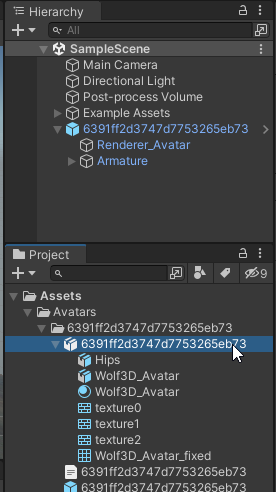
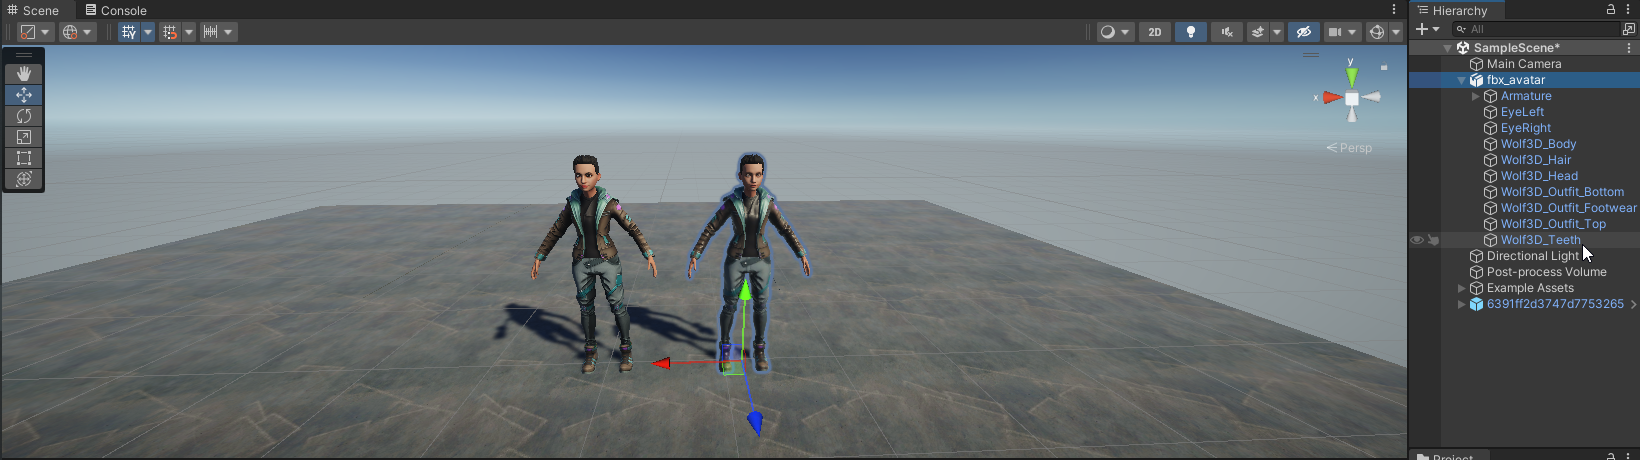
On the Project window, you will see your Reay Player Me has an FBX model, and if you drag it to Unity, it has all the texture, and you can see the additional bones/section of the model/body.

YOU’RE WELCOME 😎.


